Manufactured in & ships from America • Free standard US shipping.

EMFSafe, Inc.
EMFSafe, Inc.
  • Home
  • 101
  • DE
  • Filter
  • More pages
    • Measure
    • Process
    • Which Switch
    • Install
    • Video
    • Blog
    • Grounding
    • Office
    • Sleep
    • About/FAQ
    • Contact
  • Store
  • More
    • Home
    • 101
    • DE
    • Filter
    • More pages
      • Measure
      • Process
      • Which Switch
      • Install
      • Video
      • Blog
      • Grounding
      • Office
      • Sleep
      • About/FAQ
      • Contact
    • Store
  • Sign In
  • Create Account

  • Orders
  • My Account
  • Signed in as:

  • filler@godaddy.com


  • Orders
  • My Account
  • Sign out

Signed in as:

filler@godaddy.com

  • Home
  • 101
  • DE
  • Filter
  • More pages
    • Measure
    • Process
    • Which Switch
    • Install
    • Video
    • Blog
    • Grounding
    • Office
    • Sleep
    • About/FAQ
    • Contact
  • Store

Account


  • Orders
  • My Account
  • Sign out


  • Sign In
  • Orders
  • My Account

EMFSafeSwitch

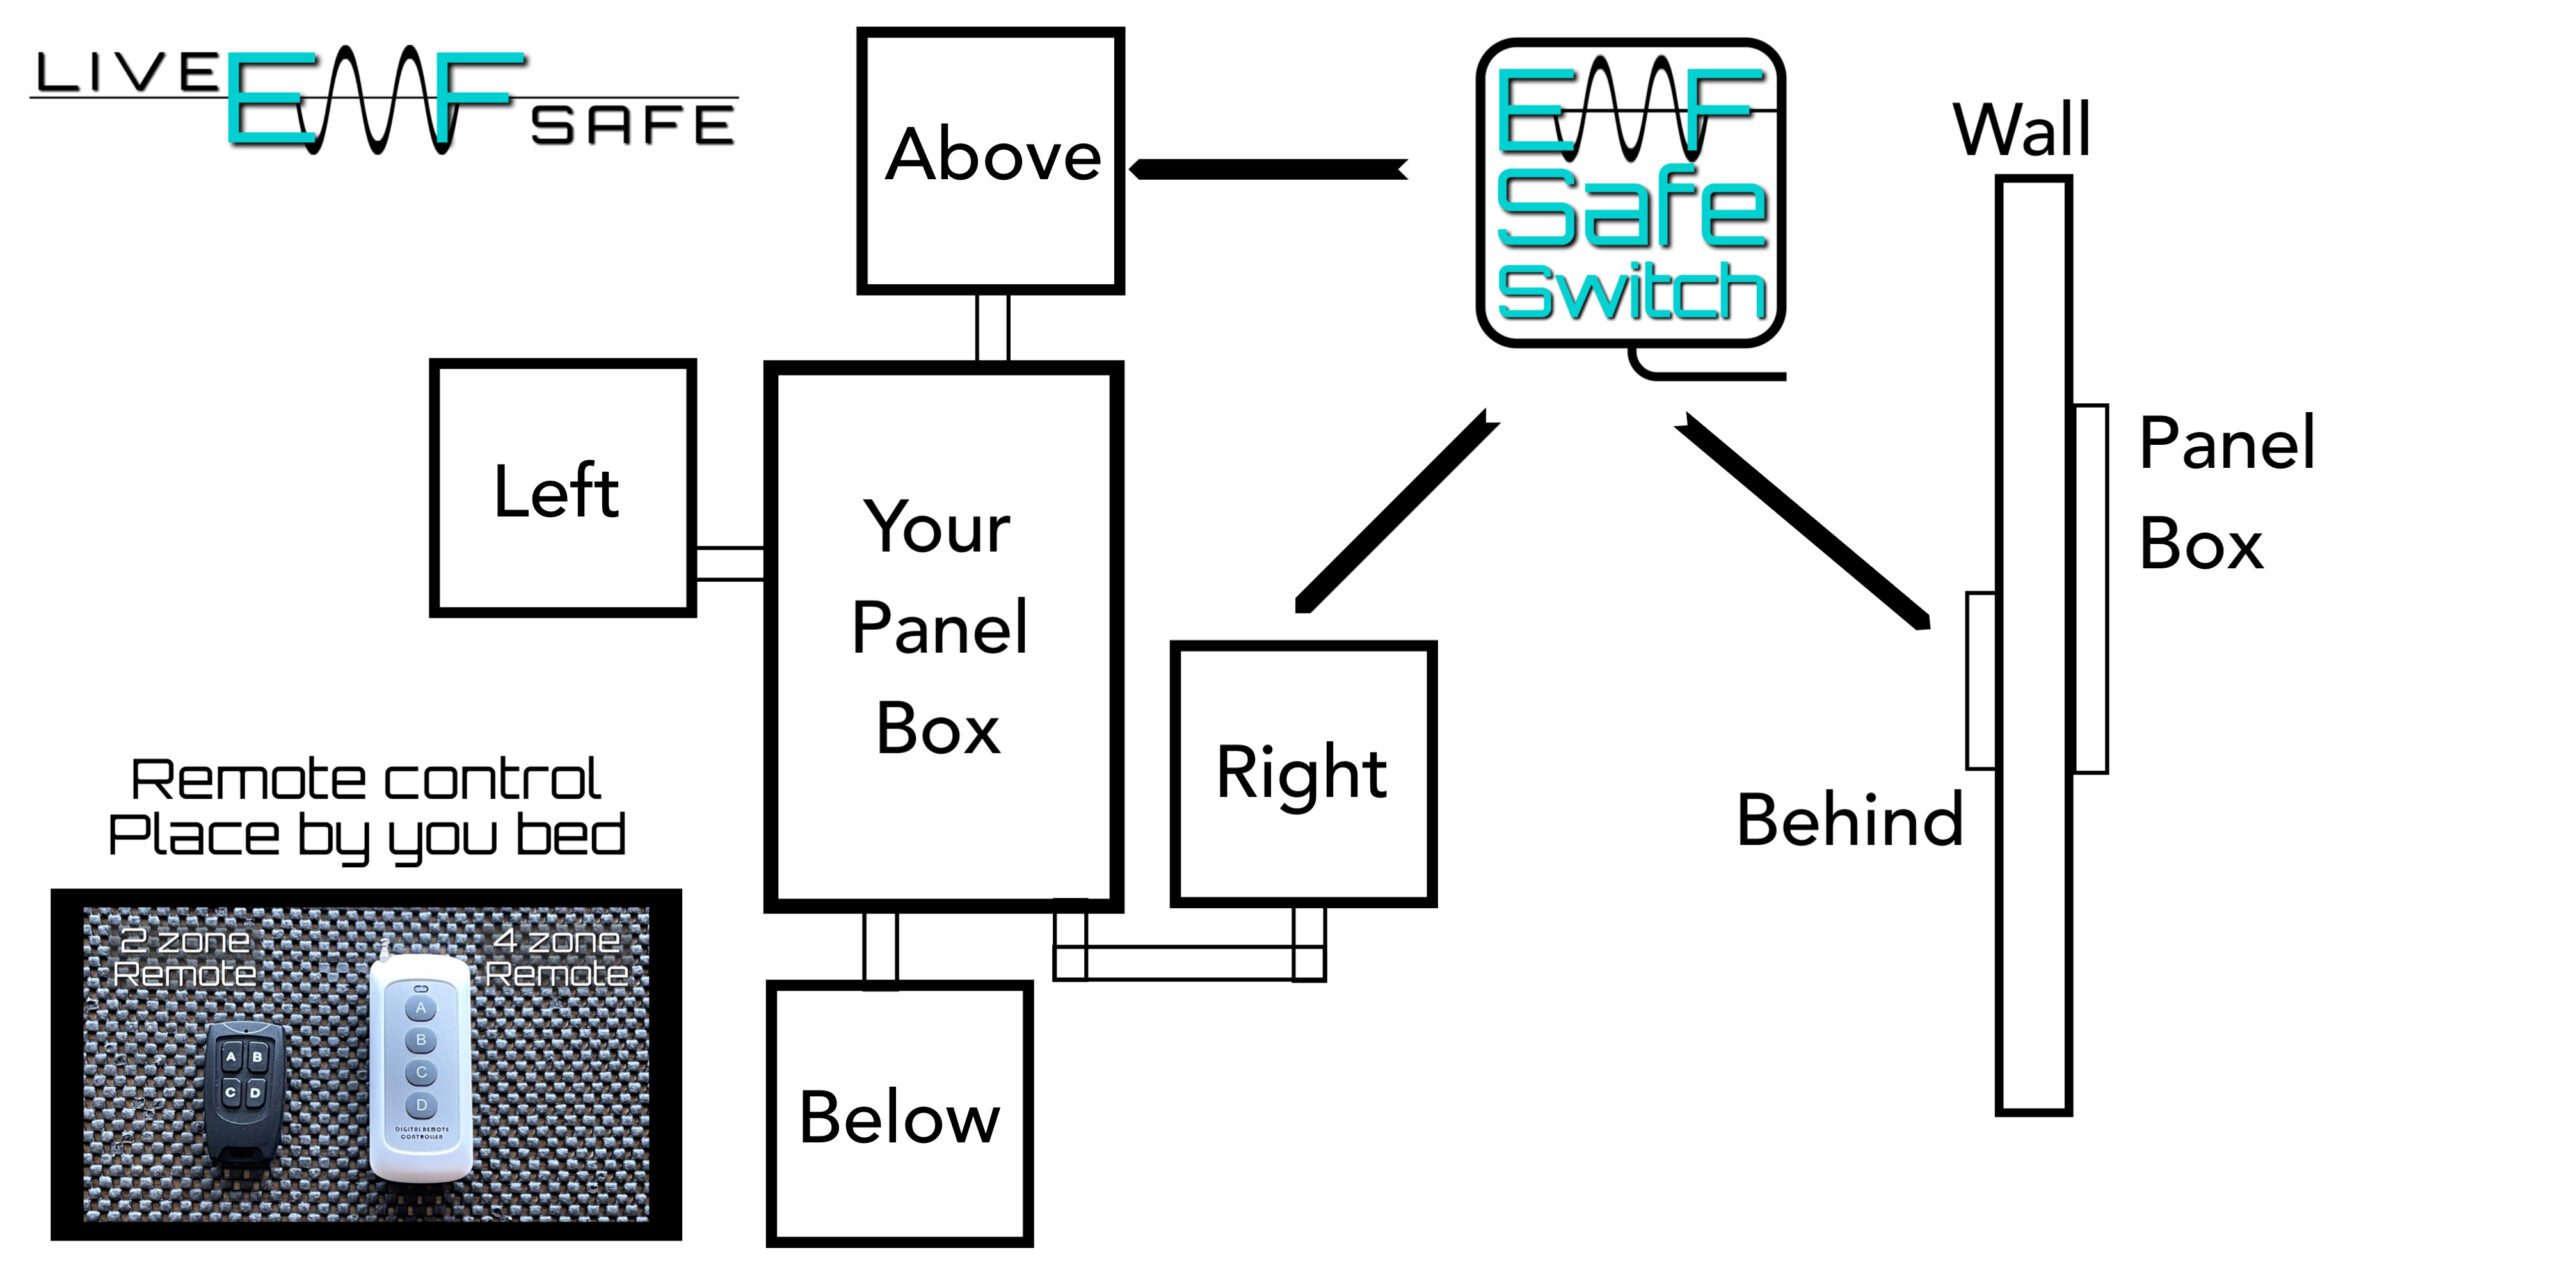
The EMFSafeSwitch goes next to your panel

The remote goes next to your bed (or wherever you want it)

We recommend you have a professional electrician install your EMFSafeSwitch. Installation times can vary. An NP-08 / SP-24 (up to 50 connections) takes longer that an NP-02 / SP-06 (up to 14 connections). A flush mount enclosure will take longer than a surface mount. That said, you should allow a minimum of two hours and three is not uncommon. Also keep in mind, in the process of installing an EMFSafeSwitch, over 50% of the time, electricians find unrelated wiring problems in the house. IF you decide to have them fix these for you, this extra time is not part of the EMFSafeSwitch installation time.


Installation Testimony

This is a note to Dan and the EMFSafeSwitch team: “I installed my EMFSafeSwitch and it is so cool! I’m not an electrician but am a DIY guy and it was a piece of cake. It was so cool to hit the fob buttons and turn my zones on and off. . . Getting a fob for each zone was a bonus . . . didn’t anticipate that. Anyway, my wife is really enjoying using the lights in the bedroom to read at night, then killing everything when it’s time to sleep. Thanks to you all for a great product! - Steve


Be in control of your EMF environment and LiveEMFSafe

How to install an EMFSafeSwitch

The pre-wired pigtail has wires that will connect with items in your main electrical panel. They are labeled and are as follows:   CB wires are to be attached to the Circuit Breakers; BC wires are to be attached to the home's Branch Circuits. This installation is very straight forward but we still recommend it be performed by a licensed home electrician. Refer to our Installation Instructions (PDF) below for more detail.

EMFSafeSwitch Installation Video

Bob Leff, California licensed electrician show how to install an EMFSafeSwitch.

Installation Instructions

Step #1:

Step #3:

Step #2:

  Mount the EMFSafeSwitch on the wall and secure the pigtail to the main electrical panel. 

Step #2:

Step #3:

Step #2:

 Label your selected circuit breakers.  Identify each circuit breaker's connected branch circuit home line.

Disconnect the branch circuit home lines from their circuit breakers (not shown).

Step #3:

Step #3:

Step #3:

Attach the CB-1 wire from EMFSafeSwitch to your #1 circuit breaker.

Step #4:

Repeat Steps 3 and 4

Step #3:

Connect the BC-1 wire from the EMFSS to your  #1 branch circuit home line.

Repeat Steps 3 and 4

Repeat Steps 3 and 4

Repeat Steps 3 and 4

for all of your identified circuit breakers and their associated branch circuit home lines.

Step #5:

Repeat Steps 3 and 4

Repeat Steps 3 and 4

Attach the power wire from the EMFSS to a 15 or 20 amp breaker.

Step #6:

Step #6:

Step #6:

Attach the neutral (white) and the ground (green) wires from the EMFSS to their standard main panel connection points.

Step #7:

Step #6:

Step #6:

2 zone - Select zone 1 or 2 for each relay/circuit.

Step 7b

Step #6:

Step #8:

4 zone - Select zone 1, 2, 3 or 4 for each relay/circuit.

Step #8:

Step #8:

Step #8:

Finished install.

Step #9:

Step #8:

Step #9:

Keep remote nearby your bed for accessibility & ease of use, maybe use velcro. 

Programing remotes

Older EMFSafeSwitch remotes

Your remotes come pre programmed but if you order a replacement or need to reprogram for any reason, this is how.


If you have a small white box next to the antenna, open it and press the button shown 3x then any button on the remote to program.

Product Specifications

EMFSafeSwitch

The EMFSafeSwitch is built in America in a 508A UL industrial control panel shop and come as a complete unit (electrical pigtail with  conduit included) ready to install, which should only take an hour maybe two  depending  on  size  and  configuration.. Being UL listed they are safe for your home, will pass building inspection and not void your home owners insurance (which a non-UL listed "kit" could).


DESIGN FEATURES

  • The EMFSafeSwitch comes fully wired with a pre-wired pigtail to minimize installation time and ensure proper hook-up.
  • The EMFSafeSwitch comes ready for control by use of low voltage wiring to a remote switch installed in your bedroom or optional RF (radio frequency unit) that may be installed at any time.
  • The EMFSafeSwitch is built to industrial UL 508 standards utilizing UL listed components ensuring a safe, reliable product.
  • Each unit is fully tested for functionality.


DIMENSIONS:

  • Enclosure measures 12"x 12"x 4" or 12"x 18"x 4"
  • Pigtail measures approximately 19" with an approximate additional 36" of wiring extending beyond conduit end
  • Antenna (extended range) projects less than one inch from the box


ELECTRICAL:

  • 120VAC , 20 Amp maximum for each branch circuit
  • 120VAC , 20 Amp maximum for powering The EMFSafeSwitch (no filter)
  • 240VAC .20 Amp max. for powering EMFSafeSwitchPQ (with PQFilter™)
  • 240VAC, branch circuits, special relay required.


LOW VOLTAGE SWITCHING:

  • 24VAC Type II transformer


RF UNIT:

  • 24 VAC
  • Antenna, standard: 2 dB gain/dipole --RMA connectivity
  • Antenna, extended range:


ENVIRONMENT:

  • Type 1 enclosure (indoor, standard unit)
  • Other enclosures , not standard (Type 3 outdoor, flush, etc..)-- if needed, inquire

Downloads

EMFSafeSwitch Install Instructions (pdf)Download
Solid-Remote-instructions (pdf)Download
UL Cert letter (pdf)Download
bvk-setup-levels (pdf)Download
BVK Report (pdf)Download
BEDROOM-EMF-MITIGATION-USING-THE-BODY-VOLTAGE-TESTING-METHOD-36ee (pdf)Download
EMF_Bioreactive (pdf)Download
International_EMF_Scientist-Appeal (pdf)Download
Pall-Letter-to-CalLegis-FINAL-8-7-17 (pdf)Download

Store

FaceBook  •  Instagram  •  YouTube


EMFSafe is the American manufacturer of the UL listed EMFSafeSwitch

(Also EMFSleepSwitch and original EMFKillSwitch) and the PQFilter™


If you are working with one of our affiliates, please contact them first with questions.

Feel free to call us but check the web site first, thanks.


Oregon main (phone  only) - 541-944-EMF0 (3630)    

Operations (phone/text)  - 972-849-9500

Technical Support / Custom  shop  - 541-538-9529


support@emfsafeinc.com

515 Antilles Lane, Medford, Oregon 97501


Copyright © 2022 EMFSafe - All Rights Reserved.

  • Home
  • 101
  • DE
  • Filter
  • Measure
  • Process
  • Install
  • Video
  • Blog
  • Grounding
  • Office
  • Sleep
  • About/FAQ
  • Contact
  • News
  • Store
  • Affiliate
  • EHS
  • paleo
  • Why
  • Terms / Privacy
  • Technical

Powered by GoDaddy Website Builder

This website uses cookies.

We use cookies to analyze website traffic and optimize your website experience. By accepting our use of cookies, your data will be aggregated with all other user data.

DeclineAccept